Configuring Single Sign On (SSO)
ThreatStream enables you to configure single sign-on (SSO) with the following identity providers (IDPs): SAML (2.0 only) and OKTA Marketplace. If your organization uses one of these identity providers, you can provision and manage integration with your IDP to enable SSO on ThreatStream. From the SSO tab within ThreatStream settings, you can configure an integration with your IDP by uploading an XML Metadata file from your IDP or by manually configuring the integration details. See Configuring an Identity Provider for SSO for more information.
If you use SAML for SSO, ThreatStream supports the following integrations:
-
Integration with Microsoft Active Directory Federation Services (ADFS) for user management through Microsoft Active Directory or Azure AD. For more information on enabling this integration, see Enabling User Management with Active Directory and Active Directory Federation Services
-
Integration with SAML 2.0-compliant IDPs for user management through a preferred IDP. For more information on enabling this integration, see Enabling User Management with SAML 2.0 IDP Services.
Additionally, after you configure SSO and use an IDP for user management, user accounts are automatically created on ThreatStream when users authenticate to ThreatStream from your IDP for the first time.
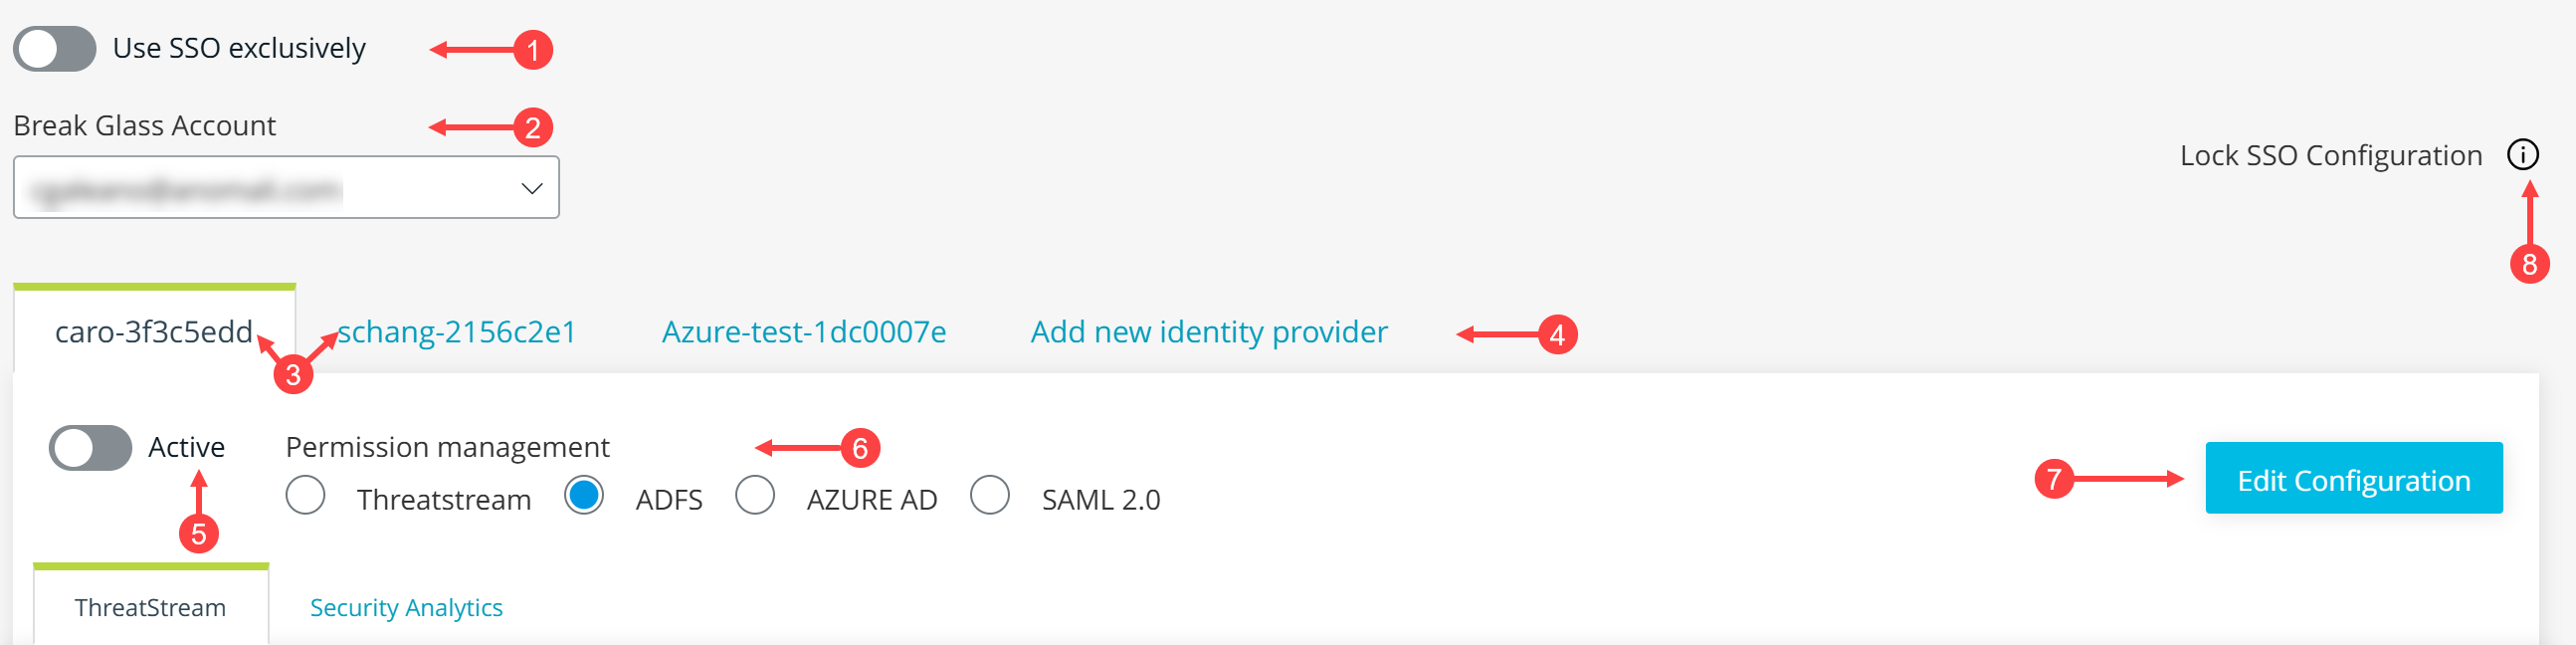
 Use SSO exclusively: Enable the Use SSO for login exclusively if you want to prevent users from logging in through the ThreatStream login screen.
 Break Glass Account: To use SSO on ThreatStream, you must select a user account to serve as a Break Glass Account. This user maintains access to ThreatStream through the ThreatStream login page, even when your organization uses SSO exclusively for login. The Break Glass Account should be an independent, local account on ThreatStream. Another account with the same configuration must not exist in the SSO IDP. Doing so will cause login failures. See Managing Organization Users to learn how to create a local account on ThreatStream.
 Configured IDPs: IDPs configured by your organization.
 Add new identity provider: Configure an IDP. See Configuring an Identity Provider for SSO for more information.
 Active: Whether the IDP is active. This switch must be enabled for users to authenticate to ThreatStream through the IDP. See Activating Identity Provider on ThreatStream for details.
 Permission Management: Permission management option selected for the IDP. If you select ThreatStream, Org Admins manage user permissions from the ThreatStream user interface. If you select ADFS, AZURE AD, or SAML 2.0, you are prevented from managing user permissions from ThreatStream and must use ADFS, AZURE AD, or a SAML 2.0-compliant IDP for permission management.
-
For more information on using ADFS or AZURE AD for user management, see Enabling User Management with Active Directory and Active Directory Federation Services
-
For more information on using SAML 2.0 for user management, see Enabling User Management with SAML 2.0 IDP Services.
 Show/Edit Configuration: View and edit configured Identity Provider Details and view configured Service Provider Details. Use this button to download the Service Provider certificate for a configured IDP.
 Lock SSO Configuration: Use this setting to prevent any further changes to the SSO configuration other than with the Break Glass account. After locking the SSO Configuration, the following SSO settings become read-only:
-
Break Glass account
-
Use SSO Exclusively
-
SSO Logout URL
-
Identity providers
-
Permission Management
-
Active
-
Show/Edit Configuration
However, you can still modify IdP Group to Anomali Role mappings.
To lock an SSO configuration, click Lock SSO Configuration or the tooltip icon ( ) next to it. In the dialog box that appears on the screen, click Lock SSO Configuration. The SSO Configuration is locked.
To unlock an SSO configuration, click SSO Configuration Locked or the tooltip icon () next to it. In the dialog box that appears on the screen, click Unlock SSO Configuration. The SSO Configuration is unlocked.
Configuring an Identity Provider for SSO
Use the information in this article to configure your IDP integration for SSO on ThreatStream.
Before You Begin
You must have an active subscription with the identity provider you are going to use. ThreatStream can integrate with SAML 2.0 or OKTA IDPs.
Setting up an identity provider with SAML 2.0
Setting up an identity provider with OKTA Marketplace
To set up an identity provider with SAML 2.0:
-
In the bottom-left corner of the side navigation panel, click
 > ThreatStream and then click SSO.
 -
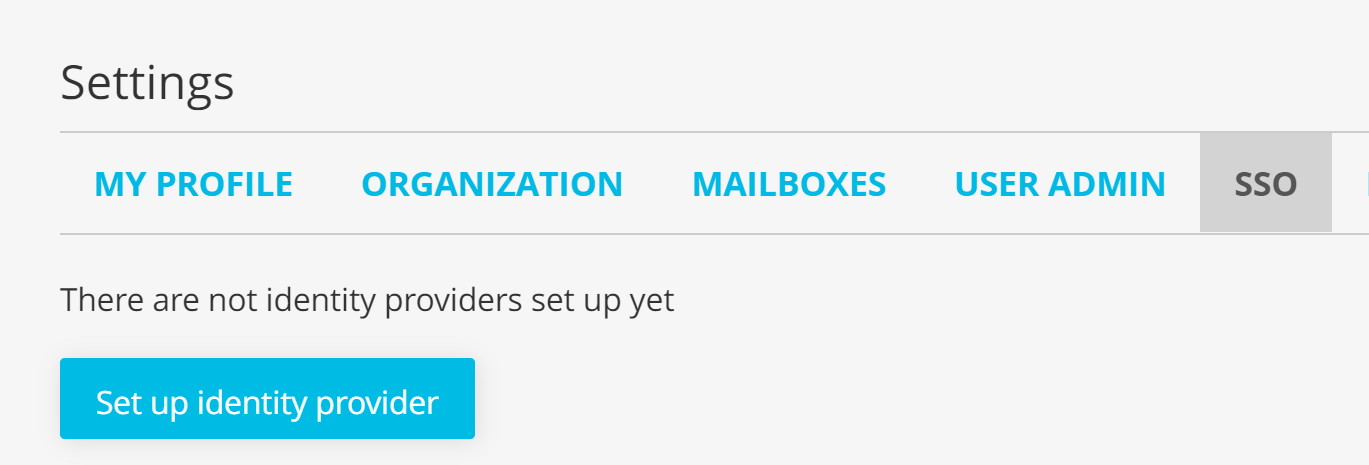
If you are setting up an identity provider for the first time, click Set up identity provider.
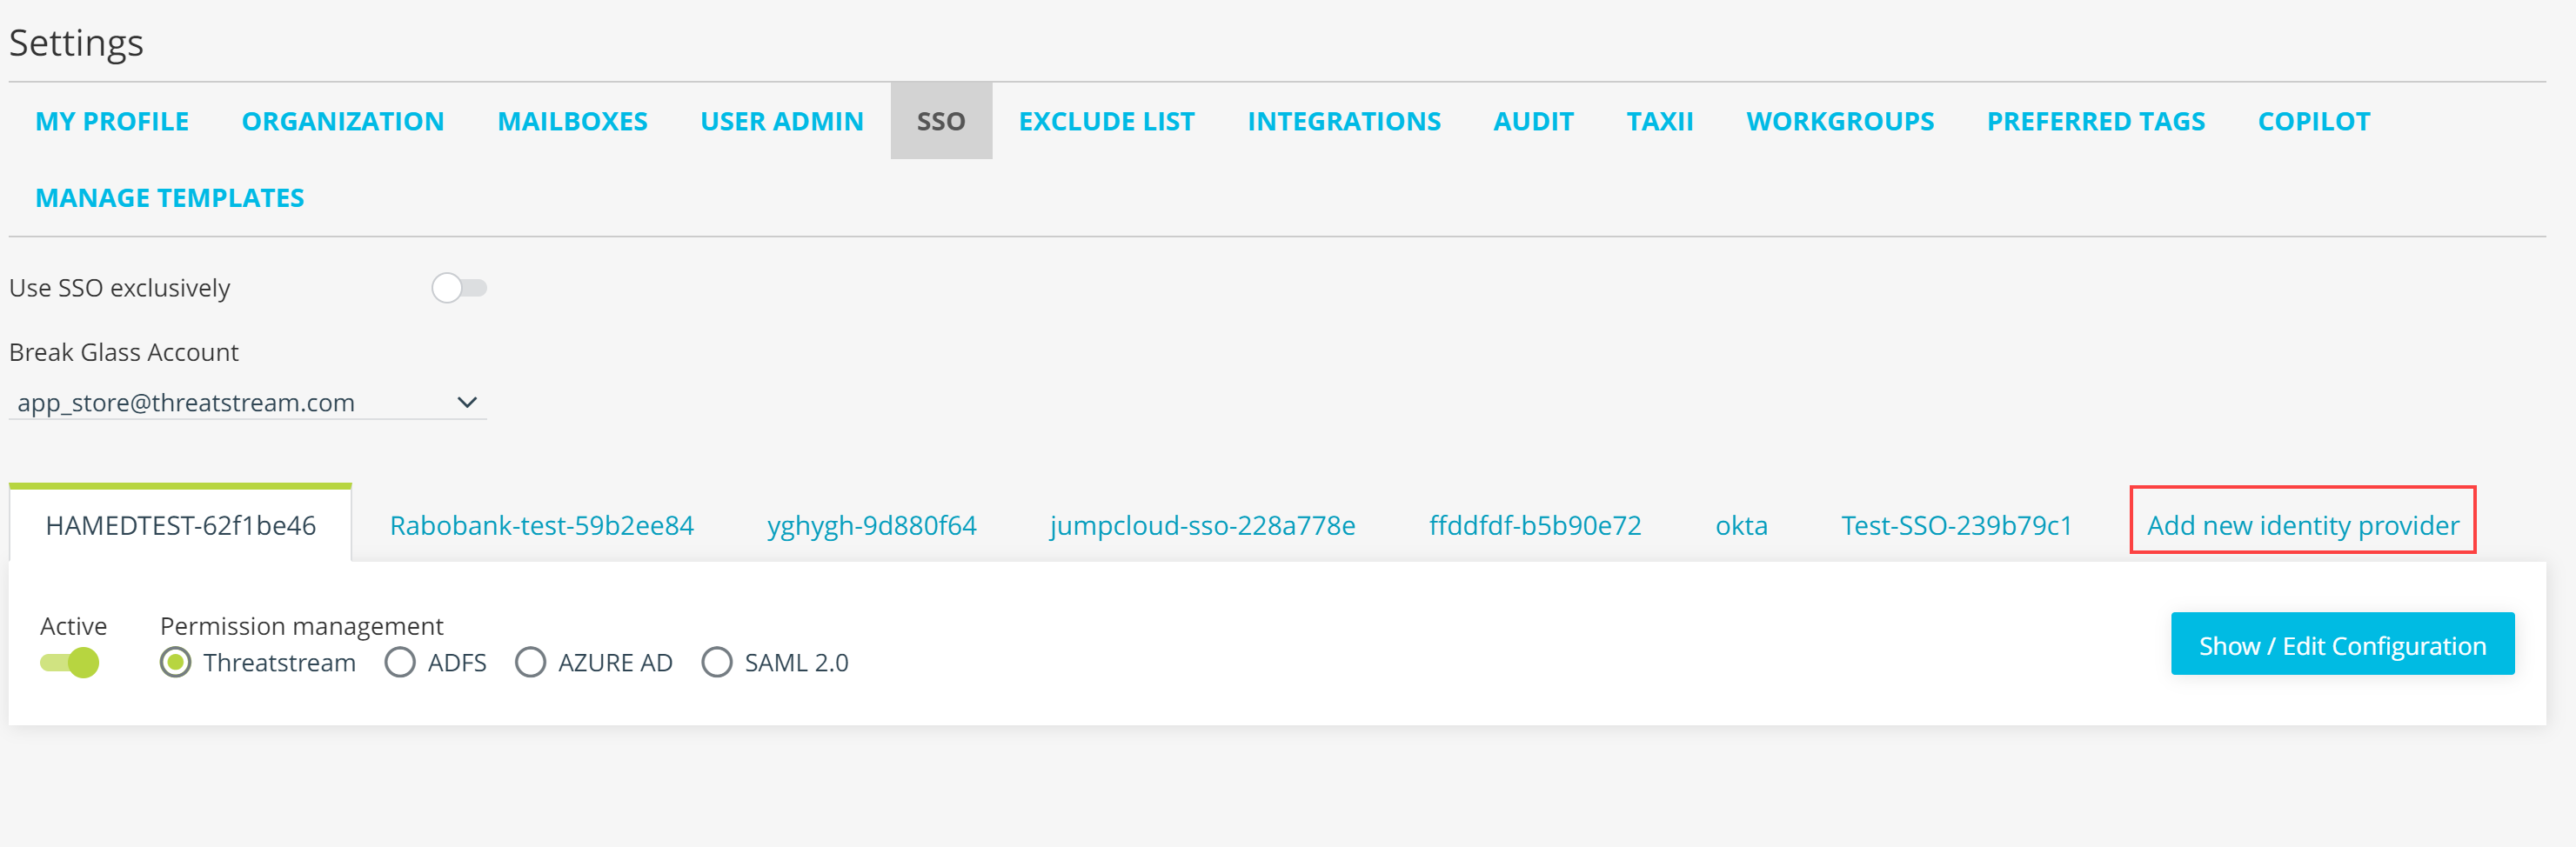
If you are adding an additional identity provider, click the Add new identity provider tab.
-
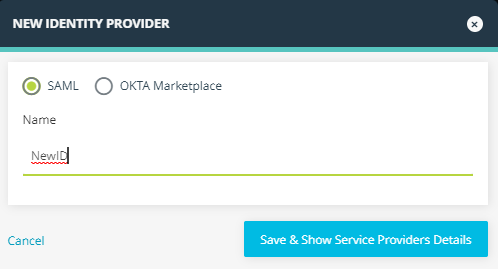
In the window that opens, select SAML, enter a meaningful name and click Save & Show Service Provider's Details.
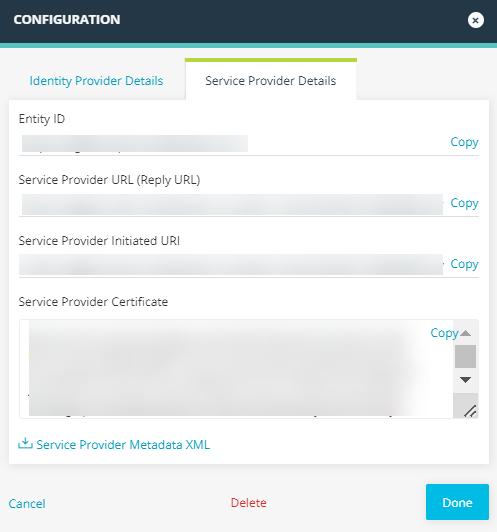
The Service Provider Details tab in the window that opens is automatically populated with the details and certificate from the service provider, which is ThreatStream in this case.
-
Click Service Provider Metadata XML to download and save the file.
-
Use the downloaded service metadata XML file when setting up your identity provider. Then, download the federation metadata XML file from your identity provider to use it in your next step.
-
Click the Identity Provider Details tab and configure the following fields.
Field Description Upload a file Drag and drop or select the downloaded SAML metadata XML file to upload.
Uploading this file automatically populates the next four fields: Identity Provider Entity ID, Identity Provider Single Sign-On URL, SAML Signing Certificate
Alternatively, you can manually enter information for the next four fields.
Name Your organization name. Identity Provider Entity ID The identity provider entity ID for your organization. Identity Provider Single Sign-On URL The identity provider single sign-on URL for your organization. SAML Signing Certificate The SAML signing certificate for your organization.
Note: This certificate must be in PEM format. Additionally, ensure that theBEGIN CERTIFICATEandEND CERTIFICATElines are not included in the file.Use for OnPrem For ThreatStream OnPrem users: check this box if you want to use SAML for SSO on your ThreatStream OnPrem Appliance. Under OnPrem FQDN, enter the domain name that you use to connect to the ThreatStream OnPrem user interface.
Note: If you update your IDP configuration on ThreatStream after the initial configuration, you must resynchronize ThreatStream OnPrem appliance to ensure that changes are reflected on your appliance. You can do so by executing the following command on ThreatStream OnPrem:user_setup -uShow advanced settings Configure any of the following optional settings: Attributes names, Sign auth request, Sign assertions, Encrypt assertions, Sign sign-out request, Encrypt name ID, Sign sign-out response, Sign messages, Encrypted name ID, Attribute statement.
You can hover over the question mark next to the setting for more information.
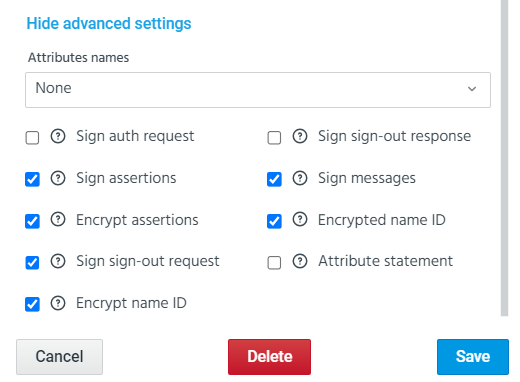 Note: You must set Attributes names to Email Address in cases where email attributes are sent in the SAML response to ThreatStream.
 -
Click Save.
Your SAML identity provider is now configured on ThreatStream.
-
Activate the new identity provider to allow users to authenticate to ThreatStream through it. See Activating Identity Provider on ThreatStream for details.
To set up an identity provider with OKTA Marketplace:
-
In the bottom-left corner of the side navigation panel, click
> ThreatStream and then click SSO. -
If you are setting up an identity provider for the first time, click Set up identity provider.
If you are adding an additional identity provider, click the Add new identity provider tab.
-
Select OKTA Marketplace.
Configure the following fields.
Field Description Upload a file Drag and drop or select the link to upload your SAML metadata XML file.
Uploading a file automatically populates the next three fields: Identity Provider Entity ID, Identity Provider Single Sign-On URL, SAML Signing Certificate
Alternatively, you can manually enter information for the next three fields.
Marketplace App ID OKTA Marketplace app ID of your organization. Company Sub Domain The company subdomain field from your OKTA Marketplace app. SAML Signing Certificate The SAML signing certificate for your organization.
Note: This certificate must be in PEM format. Additionally, ensure that theBEGIN CERTIFICATEandEND CERTIFICATElines are not included in the file.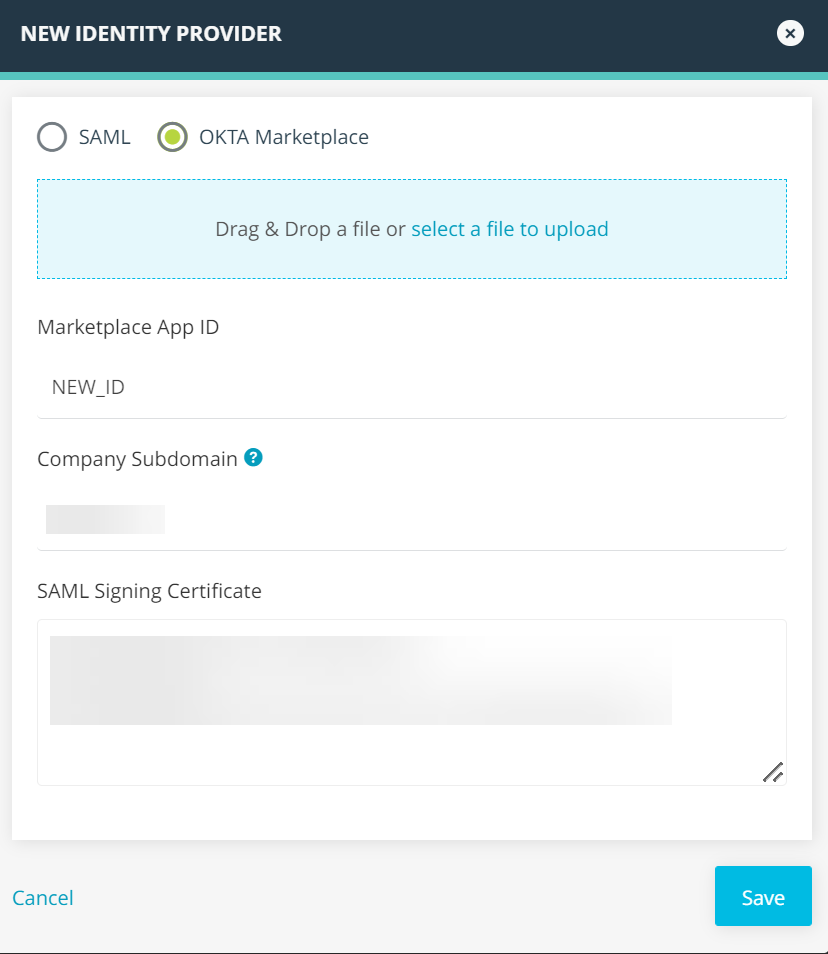
-
Click Save.
Your OKTA Marketplace identity provider is now configured on ThreatStream.
-
Activate the new identity provider to allow users to authenticate to ThreatStream through it. See Activating Identity Provider on ThreatStream for details.
To edit an IDP configuration:
-
In the bottom-left corner of the side navigation panel, click
> ThreatStream and then click SSO. -
Open the tab for the IDP configuration you want to delete.
-
Click Show/Edit Configuration.

-
Make desired changes.
-
Click Save.
Note: For some organizations that were migrated from an existing IDP configuration to the current SSO self-service configuration, the Use for OnPrem option may be selected erroneously. In these cases, you must deselect the option before saving your changes.
To delete an IDP configuration:
-
In the bottom-left corner of the side navigation panel, click
> ThreatStream and then click SSO. -
Open the tab for the IDP configuration you want to delete.
-
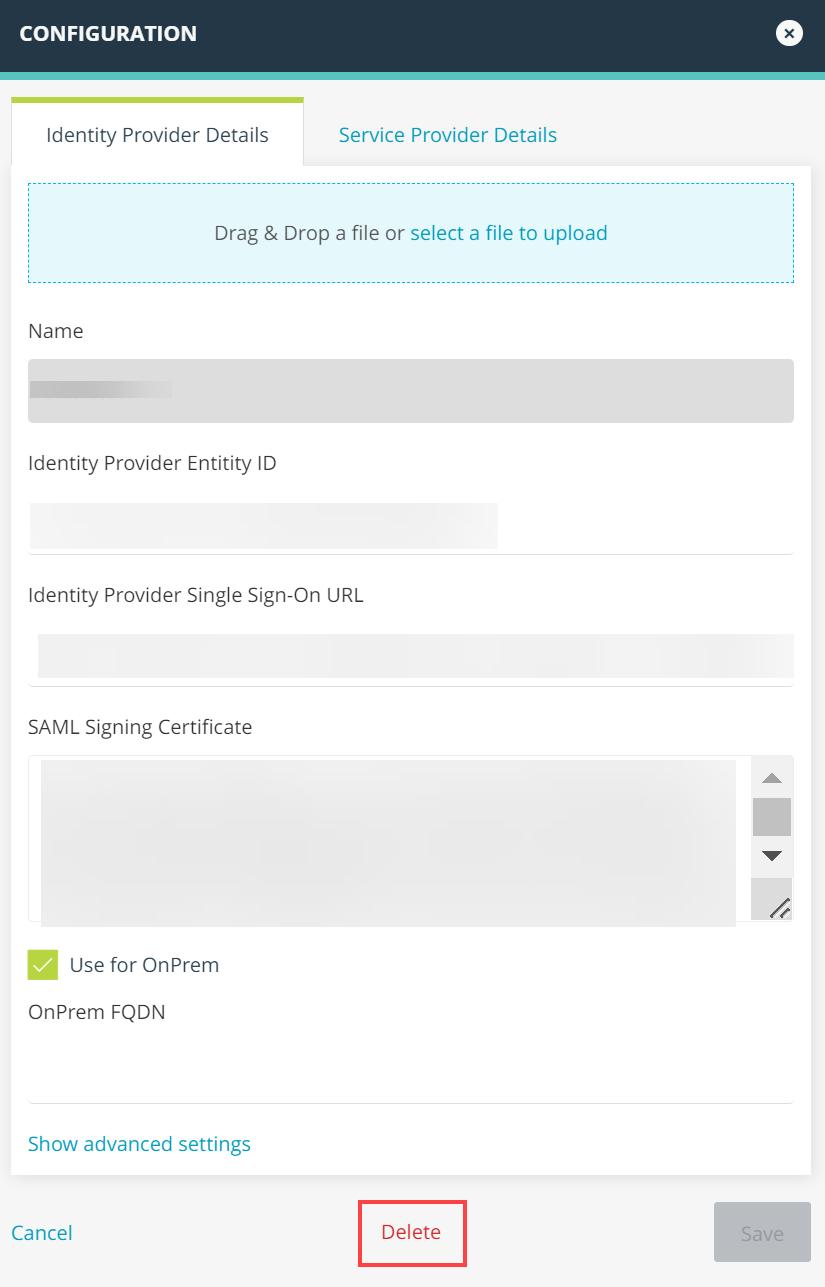
Click Show/Edit Configuration.
-
Click Delete.
-
On the Delete Configuration window, click Delete to confirm.
To allow users to authenticate to ThreatStream through the newly set up IDP, the IDP must be active on ThreatStream.
-
In the bottom-left corner of the side navigation panel, click
> ThreatStream and then click SSO. -
Select the IDP that you need to activate.
-
Enable the Active switch.
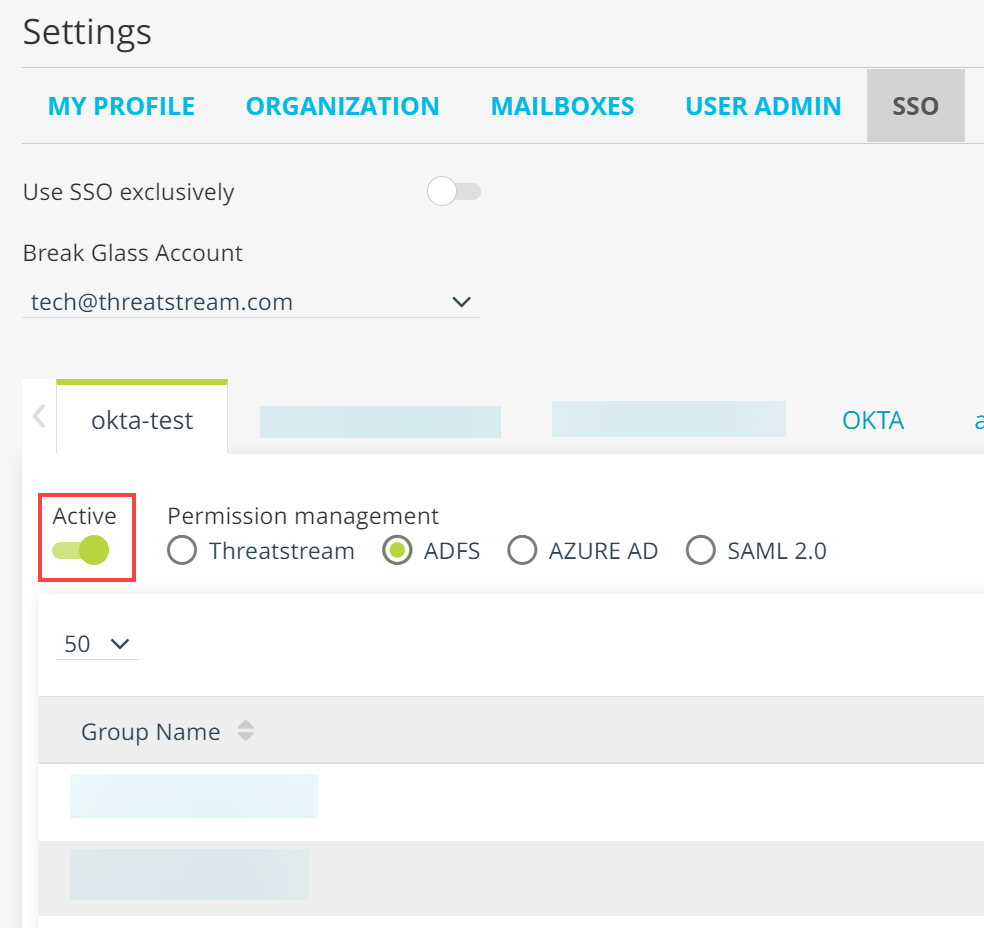
The IDP is now active.